Contract
Wizard User Manual
Table of Contents
3.1. Add Hotel Contract Details
3.3. Add Contract Rate Details
3.4.1. Room Occupancy Combination
4. Additional
Contract Load Options
4.1.1. Assigning
an Age Policy for a Supplement
4.4.1. Loading a Cancellation
Policy for No Shows
The Contract Wizard is the heart of the
Illusions system. This wizard controls the set up of rates, rules, supplements,
discounts and determines what rules will apply to a contract when it is booked.
The Contract Wizard is a generic
contracting tool that can be used to load a variety of contracts for different
products such as hotels, tours, transfers, car hire, handling fees, cruises and
packages. Contracts can range from very straightforward to extremely complex,
the Illusions contracting engine helps you manage the simplest contract through
to the most complex of contracts.
From within the contract engine, you can:
n Add a new contract
n Modify a contract
n Make a contract inactive
n Add a discount policy using different rules (such as Stay Pay deals or
Early Bird Discounts
n Add a supplement (additional charge such as extra bed or breakfast)
n Add rules for Hotel Occupancy combinations (2A2C etc)
n Add rates per person, per adult or per child
n Add rates per night or per holiday
n Add contract descriptions & notes to assist sales teams to promote
contracts and special promotions
n Add age policies against services or hotels
n Add restrictions such as minimum or maximum stays
n Add cancellation policies against specific contracts or promotions
n Add multiple date ranges
n Add Gross buy rates, payable rates & Sell rates
n Apply commissions & Tax rules
In order to make the booking engine more
efficient when searching and booking a city that has hundreds of hotels, room
types and contracts, we have implemented a function called “Process Data” in
the contracting engine which allows us to store data in a set of tables.
After each new contract is created or
modified, the product loader must ‘Process Data’ on the contract that has been
added / modified. If the data is not processed, then the new contract (or any
modifications to that contract) will not be shown in the booking engine.
This is an important part of the Contract
setup and workflow and all product load users must ensure they adhere to the
practice of ‘processing data’ after any modification at contract level.
There are several ways to access the
Contract Details:
n Access the Contract Wizard from the Wizards à Contract Wizard
(sample 1). This access can be used for either Accommodation or Service
contracts
n Access the Contract Wizard from within the Hotel Wizard menu (sample 2)
Sample 1
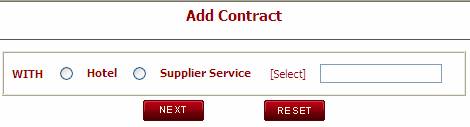
Click on Contract Wizard, the user will
find the option to Add / Modify / View All Details and Process Contract. Click
on Add Contract and the system will display the page to add contract with Hotel
or Supplier.

Select the radio button of either Hotel or Supplier and click on
select,
When the user clicks on Select the system will display the Search
Hotel window, type the name of the Hotel and click on go.
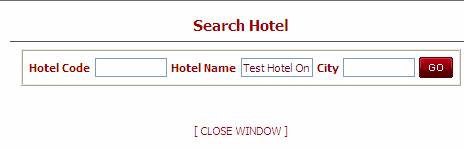
System will take the user to the Add Contract Page. (The details on
this page is explained in 3.1)
Sample 2
From the Home page, select Hotel under Wizard and Click on View All
Details.

Click on Contracts the system will take the user to

Clicking on the link for contracts will display the Find Contract
screen. Click on Add New contract to add the contract and the system will take
the user to the Add Contract page.
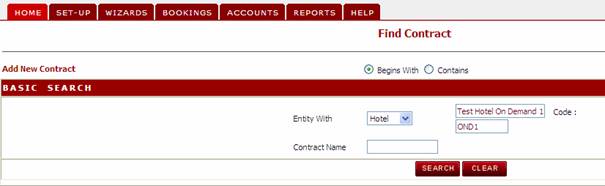
To add a new contract, click on the Add New Contract button on the
Find Contract screen.
3.1.
Add
Hotel Contract Details
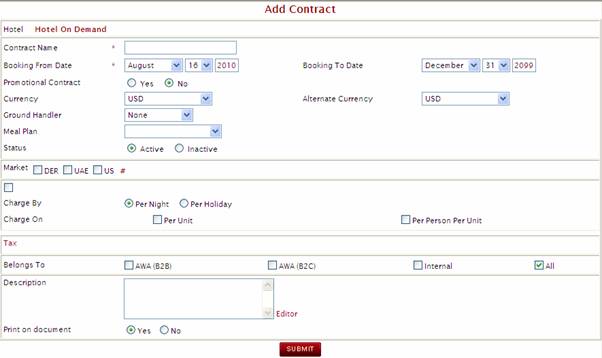
The ‘Add Contract Detail’ screen is used to enter general
information regarding the contract. This screen has a range of features and
settings which can be applied in different ways in order to get your desired
result.
n
Contract Name à This free format field
permits the user to create a unique name for the contract. This contract name
will be displayed to users during the booking process.
n
Tip: It is best to avoid naming the contract by year. Once a contract
has been created it is common to use the same contract and modify it to add the
new dates & rates for the next season. For this reason it is best not to
add the contract year in the name of the contract.
n
Booking from Date / to
Date à The booking dates will
determine when this contract will be able to be booked. Enter the date for when
this contract can be booked from. If it is likely that this contract will have
a long life, then it is preferable to load the ‘To Date’ up until 2099. If the
contract has a set booking period then add the booking from / to dates as
required.
n
Promotional Contract à Select either Yes or No. If the Promotional contract is set to Yes,
the contract will show with a ‘star’ icon to the users booking in the AWBE. If
the promotional contract is set to No, then the star will not appear in the
AWBE.
n
Currency à This drop down menu
permits the user to select the Buy currency of the contract. This is the
currency that the cost (supplier charges) will be calculated in.
n
Ground Handler → The Ground Handler defined against the contract will be used to
determine who will be paid for this contract in the Accounts Payable (Purchase
Invoice) module. The Ground Handler at Contract level will override the Ground
Handler setting at Hotel or Supplier Service level.
n
Alternate Currency à This drop down box permits
the user to select the Sell currency of the contract. (This field is not relevant
when using the markup or tariff wizards and should be set as the same currency
as the BUY currency if the tariff module is to be used)
Tip: You can use alternate
currency when you choose to store the sell prices against the same contract (rather
than use the client tariff). The alternate currency is also used for packages where
a sell contract is created without the application of the client tariff module.
n
Meal Plan à The default meal plan
for the contract should be entered here. If the contract is for Room only then
you should select the meal plan of Room Only. New Meal Plans can be created in
the General Master. The Meal Plan entered here will appear on the Contact Date
Detail screen to assist with the loading of rates (inclusive or exclusive) of this
meal plan.
n
Status à This radio button permits
the user to define whether the contract is Active or Inactive. If the user
selects Inactive, the contract will not appear for selection during the booking
process. Once a contract has been made inactive, it will disappear from the
main contract summary list.
n
Market à What market/s this
contract is applicable to. To select all checkboxes for market, click on the #
at the end of the row. All checkboxes for markets will be selected. The market
is critical when you need to create contracts based on a specific market. (i.e.
if you have one rate for the
n
Charge By à this indicator permits
the user to define if the rates should be calculated on a nightly basis (per
night for hotels or per night / per day for services) or as one off charge for
the holiday.
n
Charge on à this indicator permits
the user to define whether the rates should be charged per unit or per person
per unit. For Service contract the charge on will be Per Person or Per Service.
Your selection here will differ depending on whether you are loading a hotel,
service or a package.
n
Belongs To à Defines where this
contract can be sold. ‘Internal’ means for users of the Back Office, ‘B2C’
means the users of the Customer Web Booking Engine, ‘B2B’ means the users of
the AWBE or ‘All’ means the contract can be sold through all distribution
methods.
n
Tax à The Tax field allows you to define the tax rule that applies to
this contract. Tax rules are set up in the Tax Wizard. When you click on the
hyperlink for Tax, a pop up will appear with the tax rules defined in the Tax
Wizard. You can select one or multiple tax rules that apply to this contract
and submit. The rules will then appear on the contract header.
n
Print on Document à This flag is used to
define whether the Description should print on the Client & Hotel Tariff
Reports. If ‘Yes’, the notes will print on the Hotel & Client Tariffs.
Once the mandatory fields are completed, click the submit button. You
will be directed to the screen below.
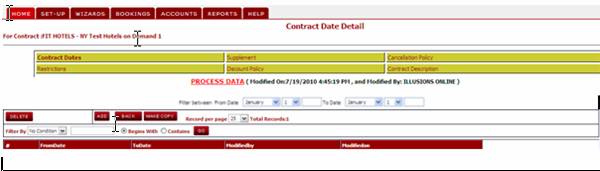
By default, the system will open to the Contract Date Details page
once you have created the contract header. From here you can add contract dates
by clicking ‘Add’.
In the add Contact Date detail screen, you have the option of
loading a Season or entering the ‘From’ / ‘To’ dates.
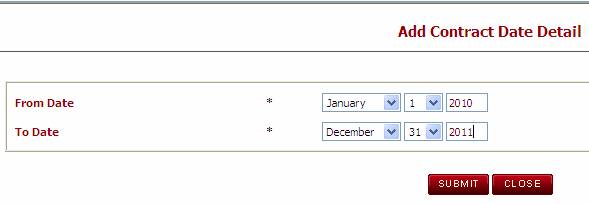
Use the drop down to choose the Dates and click on Submit.
3.3.
Add
Contract Rate Details
If you are creating a hotel contract, by default the system will
display the room types defined against the hotel along with some basic information
dependent on the criteria you selected at the contract header level. The
example below shows a contract that has been defined with the following
criteria
n
Charge By: Per Night
n
Charge On: Per Unit
This means the rates for this contract have been loaded based on a
quantity of passengers per room.

Scroll to the right to find the continuation of each record.
n
Charge For à This field is hard
coded by IOL and cannot be changed. For default will always be ‘Rate’.
n
Charge Type à This field will show the drop down based on the Charge type entered
at the Header level.
n
Gross Buy Rate à Enter the Gross Rate
from the Hotel or Supplier Contract.
n
Commission à If a commission
applies on the Gross rate, enter the amount of commission in either a
percentage or value. If the Gross rate is non-commissionable, then it is not
necessary to add a commission here.
n
Tax à The system will automatically update the tax amount based on the
tax rules selected from the Contract Header.
n
Payable à This will display the amount after calculating the Commission and
Tax if any. The payable amount is the
amount that will show in the supplier charges in the Backoffice booking.
n
Buy Rate à This value will be
automatically calculated based on the Gross Buy Rate and the Commission
entered. Make sure that this rate equals the net rate on the contract.
n
Net Sell Rate à No longer used as the
Client Tariff replaces this feature
n
Sell Markup à No longer used as the
Client Tariff replaces this feature
n
Sell Rate à This field can be used for Service Contracts
only. If you prefer to add a sell rate against a specific contract, rather than
to use the Client Tariff for applying a markup on your buy rate, then you can
directly enter the sell rate in this field. In the event a sell rate is added
at contract level the following logic will apply.
o
If the system finds a sell rate against the contract, it will not
apply the client tariff
o
The system will check the alternate currency of the contract and
match this against the currency of the client. The contract will only show to
clients that have a currency that matches the contract alternate currency.
o
If there is no sell rate stored against
the contract and the buy rate currency is the same as the client currency, the
system will take the buy rate and apply the markup (as per the client tariff)
to define the sell rate.
o
If there is no sell rate stored against
the contract and the buy rate currency is NOT the same as the client currency,
the system will take the buy rate and apply the exchange rate + markup to define
the sell rate
![]()
n
Age Policy à This field is only relevant if you are creating a contract for a
service and where there is a charge type = to Child.
Once you have loaded all dates and prices the records will appear
on the Contract Date Details screen as shown below. Click on Process Data to store the
information.
Note: If you do not click on Process Data, the information that you
have created will not be visible in the booking engine.

To modify a record once it has been created, click on any of the
lines within the summary page and the Modify window will open. Make the
required modification and submit.
Please remember to Process Data after any modification.
From the Contract Date Detail Summary page, there is a link on the
right side of each row for adding a Room Occupancy.
Click on the Room Occupancy link and the following page will be
displayed. From here you can add, delete or copy the room occupancy
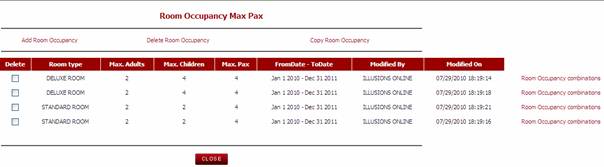
To Delete Room Occupancy, select the checkbox for the room you wish
to delete and click delete room occupancy
To Copy Room Occupancy, select the checkbox for the room you wish
to copy and click on Copy Room Occupancy.
From within this page, you can also apply a room occupancy
combination.
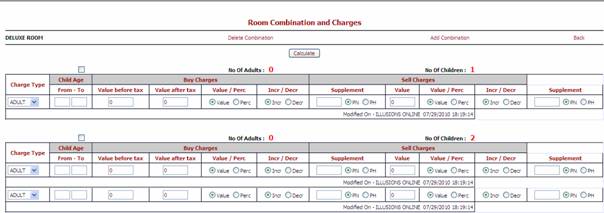
3.4.1. Room Occupancy Combination
This allows the user to delete the rooms that do not meet the
Maximum Occupancy rule in each room type. You should delete all of the
combinations that are not applicable for that room type and click submit once
complete.
From this screen, you can also increase or decrease the cost based
on the combination of passengers in each room.
n
Delete Occupancy à Click on the checkbox of the room occupancy combination that you
need to delete and select the link for ‘delete combination’.
n
Add Occupancy à You can add a new combination of passengers by clicking on the Add
Occupancy link. A pop up window will appear where you can define the
combination of adults and children that you want the system to create
n
Charge Type à The Charge Type will show the room type that you are adding an
occupancy for
n
Buy Charges à The BUY charges is where you adjust the base room rate by applying
an increase or a decrease for an amount or a percentage. The increase or
decrease will apply from the base room rate
n
Sell Charges à The SELL charges are no longer used and will be removed from the
system as part of the next upgrade. (This has been replaced by the Client
Tariff Markup process)
n
Supplement à Indicates whether the
charge is to be applied per night or per holiday. By default this should be
left as Per Night
4.
Additional Contract Load Options
After you have added the Contract Dates and Rates, you can add
additional rules and policies additional rules and features that can be added
to complete your contract. These are:
n
Contract Dates à This is where you add
any new date ranges and rates (see steps above)
n
Supplement à This section allows
you to define optional and mandatory supplement charges which will apply to
your base contract (Supplement could be an extra bed cost or a meal plan)
n
Cancellation Policy à This area allows you to load cancellation policies which are
specific to the contract
n
Restrictions à This area allows you to define a minimum or maximum stay rule
against the contract
n
Discount Policy à This area allows you to add a discount policy which is specific to
this contract. Discount could be a Stay / Pay deal or Early Bird Discount
n
Contract Description à This area allows you to define a general description for the
contract. This description will be shown to the users during the booking
process.
4.1.
Supplements
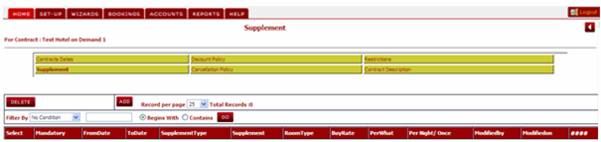
From the Contract Date Detail screen select the date band that you
wish to add a supplement against and click on the Link for Supplement. The
screen will display any supplements that have already been defined against the
contract date band selected.
To add a new supplement click on the Add button; you will be
directed to the screen below.
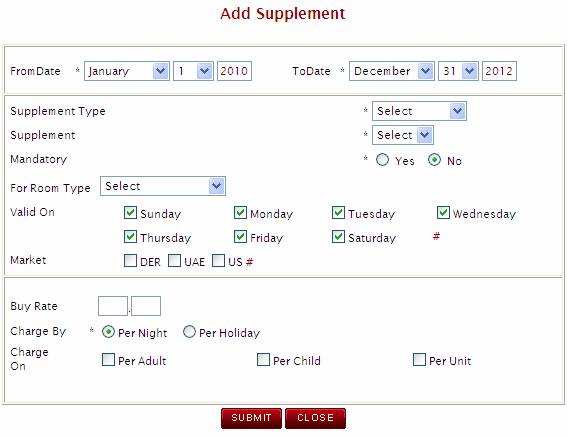
n
From/ To Dates à Select the valid from
and to dates for the supplement.
n
Supplement Type à Select from the list
of Supplement Types. The Supplement Types are defined in the Master. If the
supplement type you are adding is not in the list, you can create a new
Supplement Type in the Masters.
n
Supplement à Select a Supplement from
the list. If the supplement you are
adding is not in the list, you can create a new Supplement by adding the
Supplement.
n
Mandatory à Select whether the
supplement is mandatory or optional. If the supplement is mandatory, the system
will charge this supplement by default and will not provide the user with the
option to de-select it. A mandatory supplement can be defined for such events
such as New Year’s Eve Gala dinners. If the supplement is optional (such as a Meal
Plan, the user will have the choice during the booking process to select this
option or not.
n
Room Type à If the supplement is
only valid for a certain room type, you can select the room type that the
supplement applies to. You can only define the supplement against one
individual room type or all room types.
n
Valid On à Here you can select the
days of the week that the supplement is valid for. This is useful if you have a
supplement that applies on a set day of the week (i.e. Friday and Saturday
rates have a supplement over the weekday or mid week rates)
n
Market à Select what Market the
supplement is valid for.
n
Buy Rate à This will be calculated
automatically based on the tax, commission and Gross Buy Rate entered
n
Charge By à Nightly charge or a
one off charge for the holiday. If the rule is set to charge by night, then
this supplement will be applied for every night they are booking this contract
for (i.e. the rule would be set for By Night for Meal Plans or extra bed
charges). If the rule is set By Holiday, then the system will charge the
supplement only one time for the entire stay.
n
Charge On à This defines the rule
around whom or what will be charged for this supplement. Per Adult, Per Child, Per Unit
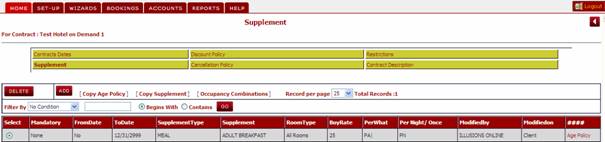
When you finish click on submit and you will be directed to the
Supplement Screen again.
4.1.1. Assigning an Age Policy for a
Supplement
Once you have created the supplement, you can then define the age
policy that is applicable for this supplement.
You can define the age of the child who is eligible for this
supplement; Click on Age Policy for the below window to open.
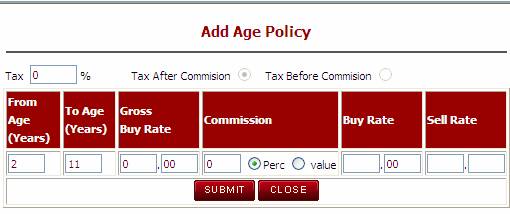
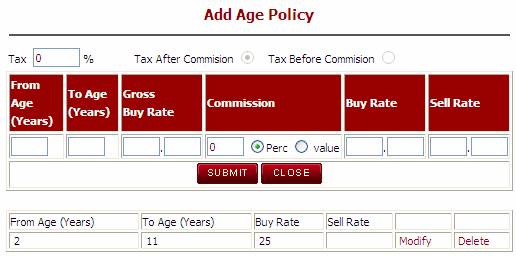
Here you can enter the age of the child that you wish to apply the
supplement rate against. Once you click on Submit another table opens up for
you to add more rules to the same supplement if required.
From within the Supplement Summary page, you can perform the
following commands
n
Copy Age Policy à Copies the age policy
of one supplement to another
n
Copy Supplement à This facility copies the supplement so that the user can create a
new record and make specific changes where required.
n
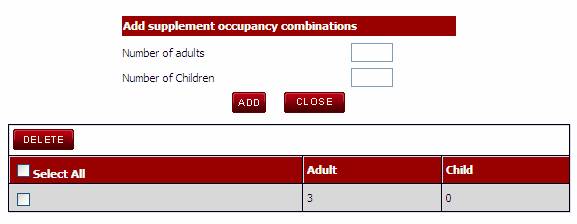
Occupancy Combination à This area allows you to load an occupancy rule against a
supplement. For example: If the
hotel has an occupancy rule where a supplement applies for an extra bed for the
3rd adult then you can add an occupancy rule which tells the system
to only charge this supplement if a certain combination of passengers applies.
When you click on the Occupancy Combination link the following
screen appears
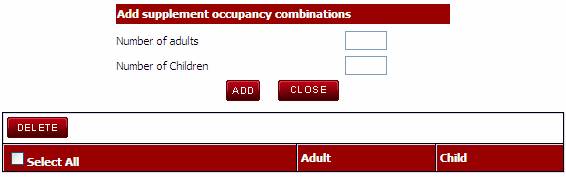
Here you can add all the possible combinations of adults and
children applicable for the supplement with reference to your room occupancy
added in the hotel level.
The Discounts module is used for applying a discount rate or
inclusions to a Hotel or Service contract. One or more discounts can be applied
to an individual hotel or service. During the setup of the discount, you can
define whether one or multiple discounts are applied and which ones can be
combined to provide the best offer for your clients.
The Discount Policy is a 3 step process:
Step 1: Enter the basic Discount Policy details
Step 2: Enter the Discount Criteria details (plus defining
combinations of discounts)
Step 3: Enter the Discount Rules details
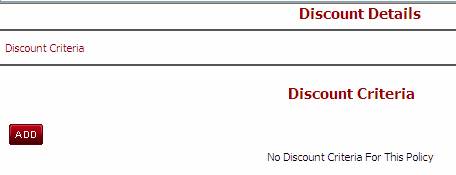
Click on the Discount Policy tab to view the discounts loaded against the Hotel selected. To add a new Discount, click on ‘Add’ and the below screen will be displayed.

n
Discount Name à The name of the
discount you are loading e.g. Stay 7 Pay 5 nights
n
Discount Type à Select discount type from dropdown menu. The discount types are
pre-set up under discount type via General Masters. A discount type is a way of
grouping your discounts under a certain type (i.e. Free Night discounts, early
bird discounts, Upgrade Discounts
n
Booking From / To Date à The validity period of the discount based on booking dates. This
field should be used if the discount applies based on the date you are booking
n
Travel From / To Date à The validity period of the discount based on the date of travel.
This field should be used if the discount applies based on the dates you are
travelling
n
Applicable On à This flag determines whether the discount will be applied on:
o
Arrival à If arrival is selected, the discount will only be applied if the
arrival date falls between the Travel From / To dates defined against the
discount
o
Whole Stay à If Whole Stay is selected, the discount will only be applied if the
whole stay falls between the Travel From / To dates defined against the
discount
o
Partial Stay à If Partial Stay is selected, the discount will be applied if any of
the stay falls between the Travel From / To dates defined against the discount
n
Market à This area allows you to define what market the discount applies to.
If the discount applies to all markets, click on the # key at the end of the row
to select all markets
n
Days Before Departure à This field allows you to define a discount for ‘x’ number of days
prior to departure (i.e. Early Bird discount)
n
Manual à This flag allows you to determine whether the discount should be
automatically applied against the contract. If Yes is selected, the system will
automatically apply the discount during the booking process. If No, the user
will have to manually select the discount or offer during the booking process
for it to be applied.
n
Combination Y/N à This flag allows you to define if the discount can be combined with
any other discount. If Combination is set to yes, then multiple discounts may
be applied to the one booking. During the setup of the discount criteria, a new
link will appear called Discount Combinations where you can define which
discounts can be combined together. If Combination is set to N, the discount
will not be able to be combined with any other discount.
n
Discount on Taxes Y/N à The flag allows you to determine whether the discount can be
applied before or after the tax has been applied.
o
If Discount on Tax = Y the calculation would be: Rate + tax +
mark-up minus discount
o
If Discount on Tax = N the calculation would be: Rate – discount +
tax + mark-up.
n
Valid On à This field allows you to define a specific day of the week that the
discount applies on. (I.e. Discount for Friday). By default, all days are
checked.
n
Note à This is a free format text field for adding notes against the
discount. Any notes added here can be printed on certain documentation by
selected one of the document check-boxes in the field below
n
Documents à This area shows a list of documents that have been created in the
system. You can define which document to add the Discount Note to by clicking
on the checkbox beside the applicable document
Once you completed the
entry of the discount criteria, click on Submit to store the discount policy
header record.
Once you have submitted the Discount Policy details, you are then
required to enter the Discount Criteria. The Discount Criteria screen will
allow you to set the rules that apply to the discount.
Click on Add to load the Discount Criteria. The following screen
will be displayed.
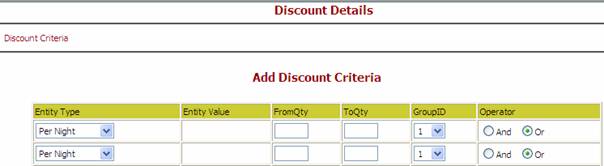
n
Entity Type à The
entity type allows you to define whether the discount applies to one of the
following criteria: Note: The Qty From / To must be filled in for each row. The
default should be entered as 1 – 99 if there is no specific rule to be applied.
o
Per Night à Used for applying a
discount based on a number of nights (i.e. Stay / Pay deal)
o
Per Room Type à Used for applying a
discount based on a specific room type. If the Entity Per Room has been
selected, then the Entity Value field will show a drop down list where you can
select a specific room type to apply the discount to
n
Entity Value à If Per Room Type has been selected, the Entity Value field will be
populated with a drop down list where you can select the relevant item to be
discounted
n
From Qty/ To Qty à The quantity or duration of stay required in order for the discount
to apply. E.g. If the rule is that you get 1 free night if you stay more than 7
nights then the Qty From would be 7 and the Qty To could be 99 which will mean
any stay between 7 and 99 nights will get 1 free night.
Note: For other Entity
Types other than Per Night, the Qty From should be set to 1 and the Qty To
should be set to 99
n Group ID à This is a numeric field used to group discount conditions where
there is more than one condition (for the same hotel/service) that must be
satisfied for the discount to apply.
E.g. If you have a free night stay that applies
to only one room type, your first condition may be the number of nights and the
other condition may be a particular room type.
Note: Where
there is not more than one condition and therefore no grouping of discount is
required, you are still required to complete this field with 1.
n Operator à The Operator field
works in conjunction with Group ID and is used to denote how the discount
should operate, either on its own or in combination with another discount.
Example: If 2 (or more) discounts for the same
hotel/service are linked at this level using AND, then only one set of rules is
set-up in the next screen. If however the discount is set to OR then you are
required to set-up 2 sets of rules, one for each linked discount.
Click on Submit and the below screen will be displayed.
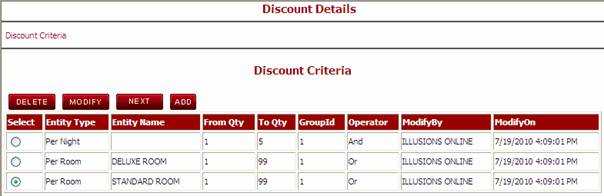
From here, click on Next to create the Discount Rules. This is the
final step in the setup of the discount. Click on Add to add the discount
rules.

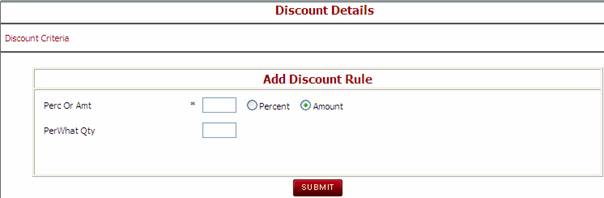
n
Percentage or Amt à Used to indicate if
the figure placed in this box is a percentage discount or a fixed value
(amount) discount.
n
Per What Qty à This field is mainly
used when creating a discount which only applies to a certain number of nights
of the total stay.
o
Example 1: On a Stay 7 Pay 5 deal, you would add the Per What Qty
as 2 which would indicate you get 2 free nights when staying 7 (7 would be
defined on the previous discount criteria screen)
n
Example 2: If in addition to a Stay 7 Pay 5 deal you may have an
additional discount rule (where 10% discount applies). You may want to apply
the additional 10% only to the payable nights (i.e. 5 nights and not the 7
nights). In this scenario you would enter the Per What Qty as 5.
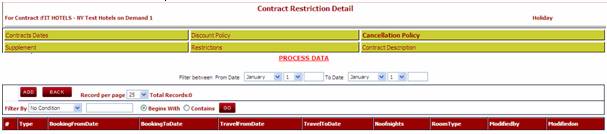
The restrictions link allows you to add a rule to apply a minimum
or maximum stay for a certain contract.
To add a new restriction, Click on Restrictions and select the Add
button.
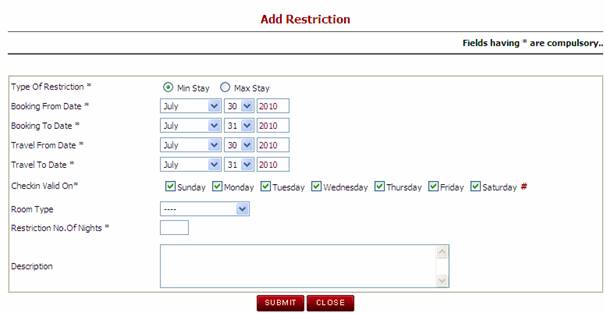
n
Type of Restriction à Select the radio
button to define if the restriction is for a Minimum stay rule or a Maximum
stay Rule
n
Booking From / to Date à In this section you
must enter the booking date range for when the restriction will apply. These
fields are mandatory.
n
Travel From/ to Date à In this section you must enter the travel date range for when the
restriction will apply. These fields are mandatory.
n
Check in valid on à Select the days of the
week where the restriction applies. If the restriction applies for all days of
the week between the booking dates and travel dates loaded above then click the
# to select all days of the week. If the restriction only exists for bookings
that check in on a Wednesday, then you should only select the checkbox for
Wednesday. By Default the Check in Valid On is set to all days.
n
Room Type à If the restriction
applies to one particular room type, then select the room type from the drop
down list. If the restriction applies to all room types, then leave this field
blank.
n
Restriction No of
Nights à This field is where
you define the minimum or maximum stay rule. (e.g. 3 for a 3 night minimum
stay)
n
Description à Internal notes for informational purpose only and will not appear
anywhere.
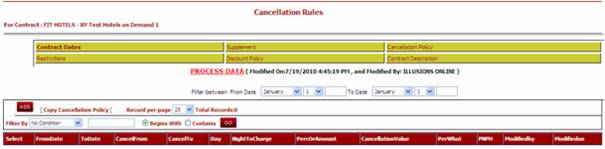
In this area of the system you can define the cancellation policy
that applies to a specific contract. From the Contract Date Detail screen click
on Cancellation Policy à Add Cancellation à you will be directed
to the screen below. You can have multiple cancellation fee records depending
on the rules applied by each hotel.
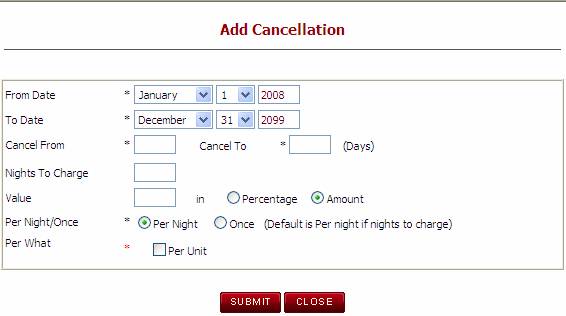
n
From / To Date à The dates entered here
are the period for when this specific cancellation fee applies.
n
Cancel From / To à The number of days or
hours before arrival that the cancellation fee should be applied. E.g. If you
have a cancellation policy from 4-7 days then ‘Cancel From’ would be 4 and
‘Cancel To’ would be 7.
n
Nights to Charge à The number of nights
that will be charged as a cancellation fee if this cancellation policy were
applied.
n
Value à The amount or
percentage to be charged.
n
Per Night or Once à Select the radio
button for Per Night if the cancellation fee applies per night. Select the
radio button once if the cancellation fee applies to the entire stay.
n
Per What
o
Per Unit à If Per Unit is
selected, the system will apply the cancellation charges for the entire unit
(this will charge a one time fee regardless of the number of passengers booked
against the service or hotel)
4.4.1. Loading a Cancellation Policy for No Shows
When a hotel has a cancellation policy for a No Show, the system
has been set up to accept the following cancellation policy entries. No shows
are usually cancelled after the first departure date of the booking so the
cancellation policy has to be loaded with a negative day value in order to
process the charges correctly
To add a No Show cancellation policy, the rules must be set as
follows:
‘Cancel From’ = -99
‘Cancel To’ = 0
The contract description is used for displaying important
information about this particular contract to the users during the booking
process. The contract description should include information such as the
Inclusions of the contract being loaded or any special conditions that the user
should be aware of when booking this contract.
This information is displayed to the user on the Room Type / Contract
screen in the Back Office booking process.

n
Language à Use the drop to select the language that was loaded in the Masters.
n
Belongs to à Defines where this contract can be sold. ‘Internal’ means for users
of the Back Office, ‘B2C’ means the users of the Customer Web Booking Engine,
‘B2B’ means the users of the AWBE or ‘All’ means the contract can be sold
through all distribution methods.
n
From / To Date à The dates entered here
are the period for when this specific Travel period.
n
Description à This area allows you to define a general description for the
contract. This description will be shown to the users during the booking
process.
In the documentation it will shown under the
Section as Inclusion.
n
Documents à This area shows a list of documents that have been created in the
system. You can define which document to add the Note to by clicking on the
checkbox beside the applicable document.
Contracts can be deactivated by entering the Modify mode of the
Contract. Click on the Contract Wizard use the Filter By and select the option
that you want. Enter the name of the entity that you want to Inactivate. Click
on Go, a list of all the Contract with similar name will appear if there is more
than one contract. Click on the Modify Contract select the radio button to
Inactivate and Submit.
From the Contract List screen, click on the link for ‘List Inactive
Contracts’

Select the radio button Status as Inactive and Submit.
To re-activate a contract, use the same Modify Contract and Select
the radio button of Active and Submit.
After submitting, the contract will be made active and will be
removed from the Inactive Contracts List.